Showing posts with label Sandwiches. Show all posts

Sunday, May 3, 2015

Parmesan-Crusted Grilled Mozzarella Sandwich


Another kid-friendly favorite in our house!  What's better than a grilled cheese?  A pizza-inspired grilled cheese!  Coating the outside of the sandwich in Parmesan cheese makes a delicious and flavorful crust that is reminiscent of Italian cuisine.  We like to dip ours in an Italian (red) sauce like spaghetti sauce or marinara.  This would probably be really good dipped in a hearty tomato soup as well.  Try giving it more of a "pizza" flavor by sprinkling some Italian seasoning on the mozzarella cheese before cooking.

Ingredients:

  • 2 slices bread
  • 2 slices mozzarella cheese
  • 1 tablespoon olive oil
  • 1/4 cup shredded Parmesan cheese
  • Italian (red) sauce, for dipping
Pan Insert to Use:  Base Unit

Servings:  1

Directions:
1. Preheat grill. If using the Xpress Platinum, preheat at setting 2.
2. Spritz pan with non-stick spray.
3. Place 2 slices of mozzarella cheese between 2 slices of bread.


4. Brush outside of sandwich with olive oil and press into the shredded Parmesan to coat - do this with both sides of the sandwich.


5. Place in grill and close cover.  Cook for 2-3 minutes, flip, cook other side for 2-3 minutes.
6. Let cool slightly before eating - the cheese will be HOT!

Monday, April 20, 2015

Low-Carb Crustless Pizza Pocket


When I was a kid, I hated the crust on pizza.  It was always left on my plate long after I was done eating.  My kid is no different than I was.  She loves the ooey, gooey delicious "pizza" part of the pizza - and hates the crust.  That's sort of how this crustless pizza pocket was born.  It began as just a flat crustless pizza, but rolling it up made it easier to eat for smaller hands.  Of course, you could always keep this pizza flat if you like the traditional appearance of pizza.  This is also a great recipe when you don't have any pizza dough ready to go and just don't feel like preparing any.  It honestly doesn't get much quicker or easier than this!

Ingredients:
    • 1/2 cup shredded mozzarella cheese
    • pepperoni slices
    Pan Insert to Use: Base Unit

    Servings: 1

    Directions:
    1. Preheat grill. If using the Xpress Platinum, preheat at setting 2.
    2. Pour cheese into unit and spread evenly with spatula.  Top with pepperoni slices.


    3.  Once the edges begin to brown (about 2-3 minutes), start to "roll" the pizza up.

    4.  Continue rolling the pizza and when completely rolled, place on paper towels to drain for minute.


    5.  Let cool slightly before eating.


    Variations:
    Try adding other pizza toppings, too!  Use a tomato-based sauce as a dip!

    Tuesday, January 7, 2014

    Blueberry Breakfast Sandwich


    Blueberries are incredibly good for you.  Unfortunately, I'm not a big fan of plain ol' blueberries, and I need to jazz them up if I'm going to eat them.  I enjoy them in muffins, pancakes, waffles, and in this awesome breakfast sandwich!  I make this sandwich with strawberry cream cheese, but you could easily substitute cinnamon cream cheese - or even plain cream cheese!  Because this sandwich is so "pretty" in its coloring, it's easy to get my little girl to eat it as well.  ;)   I used frozen blueberries for this recipe, but fresh would probably be just as delicious!

    Ingredients:
    • 2 slices Texas toast (or other thick bread)
    • 2 wedges strawberry cream cheese (like the kind by Laughing Cow)
    • 1/4 cup blueberries, fresh or frozen
    • 2 tablespoons butter or margarine

    Pan Insert to Use:  Base Unit

    Servings:  1

    Directions:
    1. Preheat grill. If using the Xpress Platinum, preheat at setting 2.
    2. Spritz pan with non-stick spray.
    3. If blueberries are frozen, thaw them in the microwave.
    4. Spread each slice of Texas toast with 1 wedge of strawberry cream cheese.
    5. Place blueberries on 1 slice of bread and close sandwich.


    6. Spread butter/margarine on the outside of the sandwich - about 1 tablespoon per side.


    7. Place in grill and close cover.  Cook for 2-3 minutes, flip, cook other side for 2-3 minutes.
    8. Let cool slightly before eating - the cream cheese will be HOT!


    Friday, August 30, 2013

    Grilled Cheese Sophistiqué

     
    Even grown-ups still love kid-favorites like mac & cheese, pizza, chicken nuggets, and grilled cheese.  The grilled cheese sandwich is the ultimate kid "dinner" and I must admit that even I (a self-proclaimed grown-up) enjoy a delicious, gooey, grilled cheese sandwich every now and then.  This version, the Grilled Cheese Sophistiqué (or Sophisticated Grilled Cheese), is a version completely for grown-ups - complete with a crunchy, Parmesan crust.  The flavor combination is complex, to say the least.  This is a sandwich that seems complicated, but is actually quite easy.  You won't be sorry you tried this one, I promise!

    Ingredients:
    • 1/4 cup shredded Parmesan cheese
    • 1/8 cup olive oil
    • 2 slices of potato bread
    • 1 teaspoon Dijon mustard
    • 2 teaspoons apricot preserves
    • 2 slices Muenster cheese
    • 1/2 cup baby arugula

    Pan Insert to Use:  Base Unit

    Servings:  1

    Directions:
    1. Preheat grill. If using the Xpress Platinum, preheat at setting 2.
    2. Spritz pan insert with non-stick spray.
    3. Spread Parmesan cheese onto a large plate and pour olive oil into a small bowl.
    4. Brush one side of each bread slice with olive oil and then press each into the Parmesan, coating completely.


    5. Place bread slices Parmesan-side-down onto a sheet of wax paper.  Spread one slice with the Dijon mustard, and spread the other slice with the apricot preserves.
    6. Place 1 slice of Muenster cheese onto the slice with the preserves.  Cover with the baby arugula.


    7. Place the second slice of Muenster on top of the arugula, and top with the second slice of bread, Parmesan facing up.


    8. Place the sandwich into the grill and cook for 2-3 minutes per side.


    Monday, July 16, 2012

    Tuna Patties with Dill Dip


    I'm not a huge fan of seafood, but I really enjoy finding new ways to prepare canned tuna.  I don't often crave meat, but when I do, tuna is usually where I land - probably because I lack protein and tuna is chock-full of it.  The dill dip for these patties is also a good stand-alone recipe.  If we ever have extra, we use it as a veggie dip (it's excellent with carrots, particularly) or a sandwich spread.  This is a slightly modified recipe that I got out of a cookbook that was given to charity ages ago. 

    Ingredients:
    • 1 cup sour cream
    • 1/4 cup mayonnaise
    • 2 teaspoons dried dill
    • 1 teaspoon dried, minced onion
    • 1 teaspoon dried parsley
    • 1 slice whole-wheat bread
    • 1 can tuna in water (5 oz)
    • 4 green onions, chopped
    • 1 egg, beaten
    • 1/2 cup baking mix (Bisquick is the brand I used here)
    • 1 tablespoon dijon mustard
    • 1/4 teaspoon white pepper
    • butter or margarine, for frying
    • hamburger buns, optional

    Pan Insert to Use:  Base Unit

    Servings:  4 patties

    Directions:
    1.  Preheat grill.  If using the Xpress Platinum, preheat at setting 2.
    2.  Combine the sour cream, mayonnaise, dill weed, minced onion, and parsley in a small bowl; mix well.  Refrigerate the dill dip (covered) for at least 1 hour so flavors can mingle.


    3.  Break bread slice into 6 pieces and put into a food processor (or blender).  Chop until medium crumbs are formed; set aside.


    4.  Drain can of tuna very well and flake tuna into a medium bowl.
    5.  To the tuna, add bread crumbs, chopped green onions, beaten egg, baking mix, dijon mustard, and pepper; mix well.


    6.  Form the tuna mixture into 4 patties.


    7.  Place a small amount of butter or margarine into the grill and allow to melt.
    8.  Place 2 patties into the grill and close lid.


    9.  Fry for 5-8 minutes on each side, or until patties are nicely browned and done.


    10.  Repeat with remaining 2 patties.
    11.  Serve with dill dip.  If desired, place on a hamburger bun and serve as a sandwich.

    Thursday, June 21, 2012

    Caesar Dog


    It's beginning to look like "hot dog week" at our house.  :)  We love Caesar salads here, so it's only natural that eventually we would have combined our favorite salad with a hot dog.  I present to you: The Caesar Dog.

    Ingredients:
    • 1 hot dog
    • 1 hot dog bun
    • 1/4 cup shredded lettuce
    • 1 teaspoon creamy Caesar dressing
    • 1 teaspoon shredded Parmesan cheese

    Pan Insert to Use:  Full Round or Base Unit

    Servings:  1

    Directions:
    1.  Spray grill with non-stick spray and preheat.
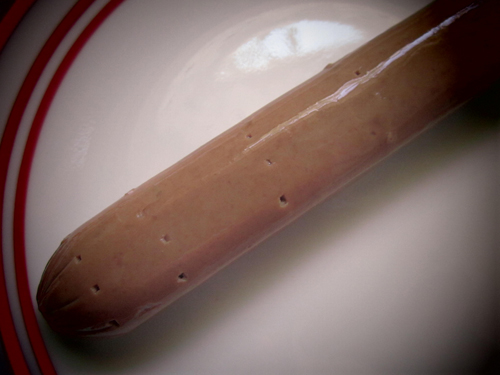
    2.  Poke holes in hot dog with a fork.


    3.  Place in grill, close lid, and cook for 5-15 minutes (depending on preference), rotating occasionally.


    4.  While hot dog is cooking, mix shredded lettuce with Caesar dressing.


    5.  Place hot dog on bun and top with shredded lettuce and shredded Parmesan cheese.

    Wednesday, June 20, 2012

    Nacho Dog


    It's been a warm week here, and we've been living on hot dogs.  They're easy, they're cheap, and there's a ton of ways to prepare them.  So, here's another fun hot dog recipe.  I wanted to find a way to "spruce up" our average hot dogs, and came up with this little concoction.  It seems a bit unusual, but if you like nacho cheese, you'll love this dog!

    Ingredients:
    • 1 hot dog
    • 1 hot dog bun
    • 2 tablespoons nacho cheese
    • 1-3 tortilla chips (depending on size)

    Pan Insert to Use:  Full Round Pan or Base Unit

    Servings:  1

    Directions:
    1.  Spray grill with nonstick spray and preheat.
    2.  Poke holes in hot dog with a fork.


    3.  Place in grill, close lid, and cook for 5-15 minutes (depending on preference), rotating occasionally.


    4.  While hot dog is cooking, warm nacho cheese (if desired) and crush tortilla chips.


    5.  Place hot dog on bun and top with nacho cheese and crushed tortilla chips.


    Tuesday, June 19, 2012

    Simple Slaw Dog


    Whenever our family goes swimming, we love to picnic on hot dogs and brats afterwards.  My husband mans the grill, and I get to kick back and enjoy it.  With the Redi-Set-Go, I can "grill" hot dogs anytime for my little one (or myself) without ever firing up the outdoor grill.  My personal favorite topping for hot dogs is simply cole slaw.  I believe adding cole slaw to hot dogs is something done regularly in the South (I could be wrong, though); either way, I can't take credit for this combination.  I heard of this idea as a very young child when my parents took me to a small restaurant in Amherst, Ohio called "Hot Dog Heaven."  One day, I'd like to take my own child(ren?) there.

    Ingredients:
    • 1 hot dog
    • 1 hot dog bun
    • prepared cole slaw

    Pan Insert to Use:  Full Round Pan or Base Unit

    Servings:  1

    Directions:
    1.  Spray grill with nonstick spray and preheat.
    2.  Poke holes in hot dog with a fork.


    3.  Place in grill, close lid, and cook for 5-15 minutes (depending on preference), rotating occasionally.


    4.  Place hot dog on bun and top with desired amount of cole slaw.  Eat it up!

    Wednesday, June 6, 2012

    B.O.T. Open-Faced Sandwich


    B.L.T.'s are quite loved in this house.  But lettuce wilts so quickly that it's sometimes hard to keep in the fridge.   Problem solved with the "B.O.T."  That's:  B (bacon), O (onion), T (tomato), and cheese & mayo, too.  :)  You could also make this a "closed" sandwich if you prefer, but I personally love being able to see the bacon resting atop a mound of cheese!  It's not the most elegant image, but it is still a very yummy one!

    Ingredients:
    • 1 English muffin
    • 2 tablespoons mayonnaise
    • 2 slices American cheese
    • 2 thin slices tomato
    • 2 very thin slices onion
    • 2 tablespoons pre-cooked, crumbled bacon

    Pan Insert to Use:  Base Unit

    Servings:  1-2

    Directions:
    1.  Spray grill with non-stick spray and preheat.
    2.  Split English muffin, and spread 1 tablespoon of mayonnaise on each half:


    3.  Layer each English muffin with a slice of tomato, a slice of onion, and a slice of cheese:


    4.  Place 1 English muffin half into the grill, close lid, and cook for about 3 minutes (or until cheese is melted).
    5.  Remove from grill and sprinkle with 1 tablespoon of the bacon:


    6.  Repeat with the remaining English muffin half.  Let cool enough to eat.